Timed assessment in the role of the designer.
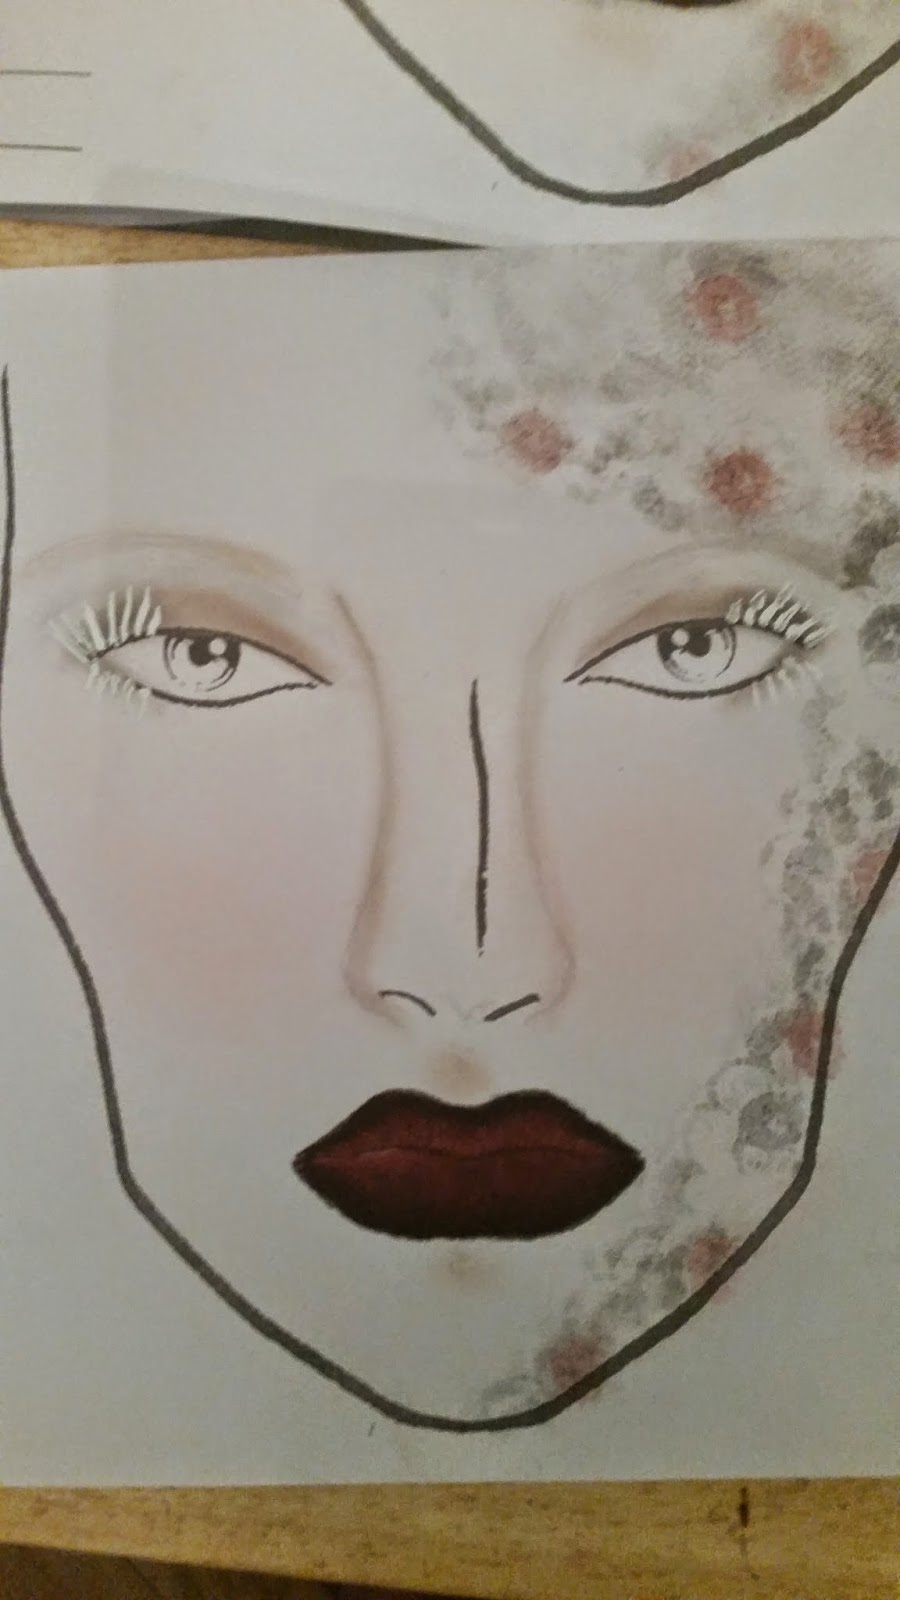
For my final Elizabaethan contemporary makeup look i wanted to incorporated texture and materials from the Elizabethans clothing into my design .
applying the base colour
Apply the matte illmasqua skin base colour which is quite a pale colour to the face neck and ears, then blend out using a buffer brush once the product looks even on the face seal the makeup using the white illamasqua loose powder roll this onto the face using a sponge.
applying colour to the cheeks
For my final design i wanted ot include a subtle colour to the cheeks, using the illamasqua pink from the blusher pallet apply the colour using the kryolan blusher brush to the circles of the cheeks, then using the kryolan glamour glow pallet apply the summer tan colour to blend out the pink and highlight the cheekbones.
applying the lace texture
next using the lace material to act as a stencil hold the fabric in place starting from the top centre of the forehead and suing the the roudned blending brush and the black pepper colour from the kryolan pallet stipple the colour into the face to create a prominent texture , carry this process out from the top centre of the forehead to the jawline on the right hand side of the face. The using the same technqiue apply several flowers from the lace fabric to the face using the black pepper colour and the red youth blush from the kryolan pallets this will help to create more design on the face. Finally apply self ahesive pearls to the centre peice of the flowers to make the design look more complete .
applying colour to the eyes
first apply a brown from the illamasqua pallet to the eyelid then using the black from the illamasqua pallet in order to create a smokey eye effetc highlight the socket area of the eyes, blend the colours well together using the roudned blending brush, the apply a white from the neutral illamasqua pallet just underneath of the brown line , using the black gel illamasqua eyeliner, highlight the lash line.Finally to complete the eyes apply white from the supra colour pallet to the eyelaashes using a dissposible mascara wand.
applying colour to the lips
firstly outline the lips using a black lip pencil then using a dark red from the kryolan lip pallet apply the colour evenly to the lips and blend the colour together with the black lips liner in order to create an ombre effect on the lips.
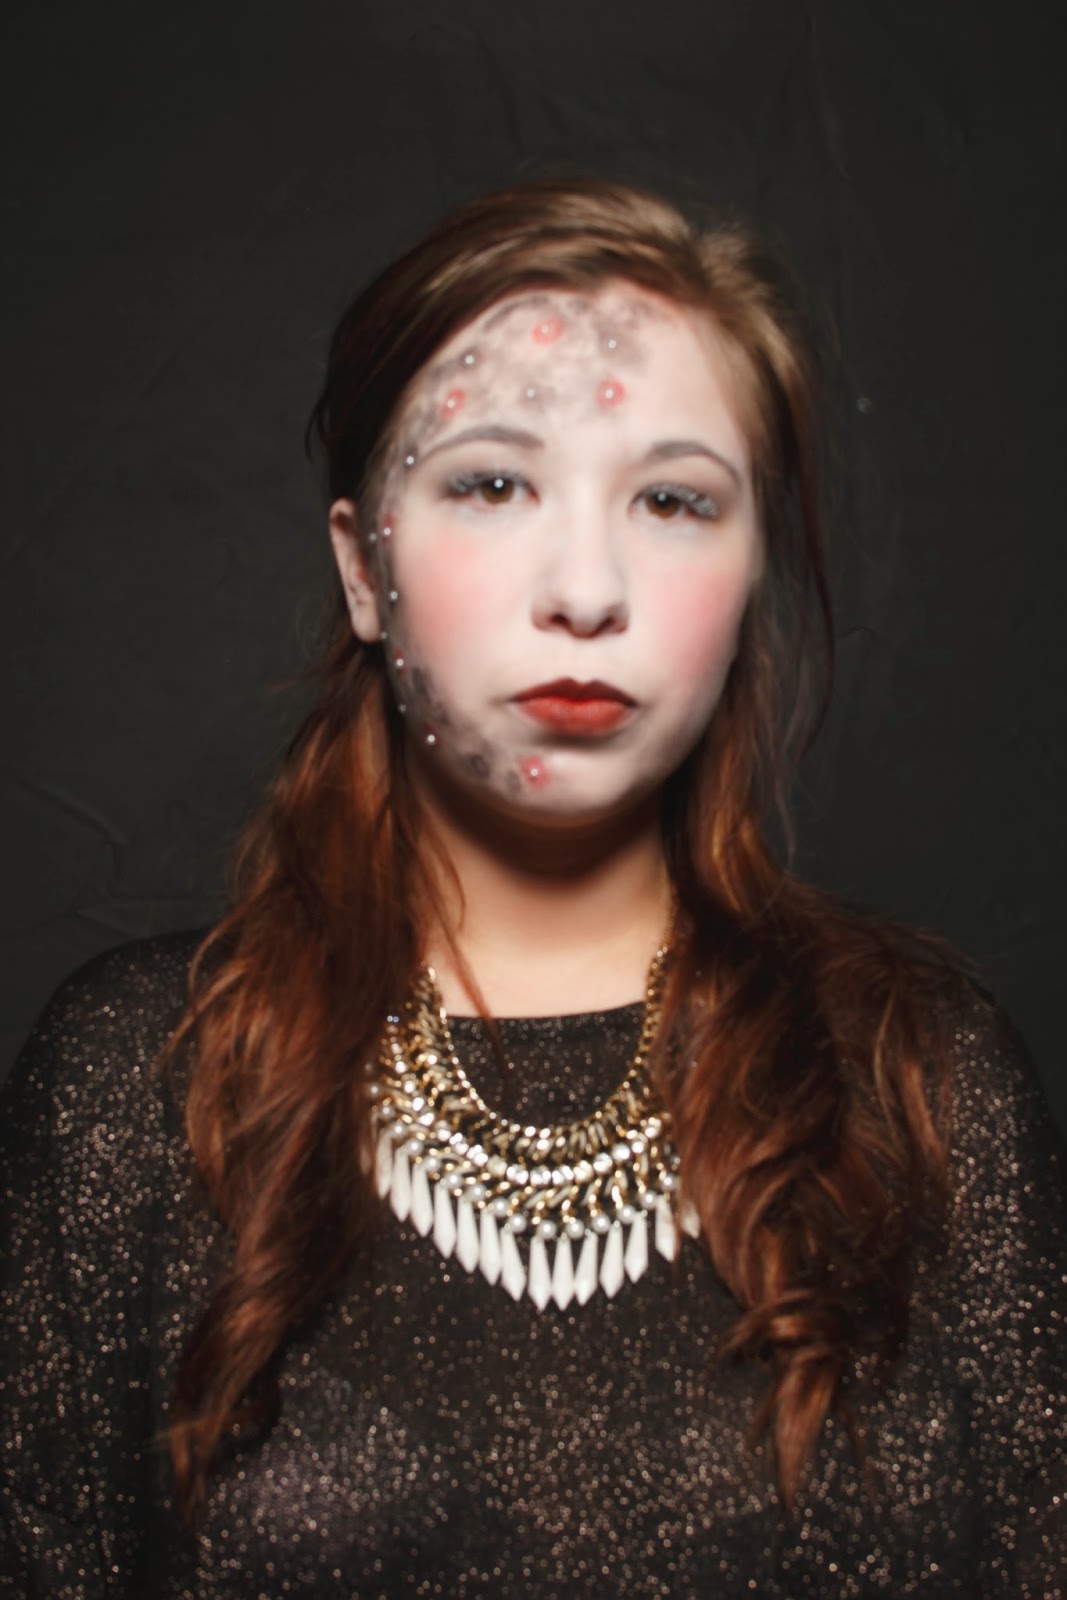
After my partner practicing my design several times in lessons i altered my design particularly the positioning of the lace until i was happy with the look. On my original design the lace was positioned across the forehead just above the eyes however i felt this did not work well with my design. Due to practicing my final design in lessons i felt this helped my partner to become more confident with my final design and focus on improving on elements which she struggled with .
For the timed assessment i created a face chart of my final design with the products which i used listed on the left hand side, i also wrote a thorough tutorial of how to create my design with step by step images on how to create the look .
Peer evaluation
I felt during the timed assessment my partner managed her
time sufficiently and executed the design I had created well. The factors I
felt she carried out successfully was applying the base colour and creating the
lace texture effect on the face this was due to good communication between me
and my partner as well as practicing my final design several times meaning that
we were able to focus on practicing elements of my design which my partner
needed to improve on and also altering parts of my design until I was satisfied
with the final outcome.
The colour applied to my eyes I felt was blended well
together creating the Smokey eye requested I wanted and the colour application
to the lips were neat, although the liner and lip colour could have been blended together
better in order to create a prominent ombre effect.
I felt my partner made a good attempt at applying colour to
my eyelashes, meaning that all the eyelashes were covered evenly some of the
colour spread around the eye but my partner managed to correct this by blending
the colour in underneath my eye and applying more of the colour on the eyelid.
My partner struggled with applying the adhesive pearls to
the flowers on my face this was due to the amount of powder applied to my
face meaning the pearls kept falling off.
Overall I was very happy with the outcome of my design
however , I felt my partner could improve applying more base colour to the
neck.